Some sage advice on DIY cat shelters from Sylvia Ottaka,
Senior Director of Rescue and Community Outreach at North Shore Animal League America
Senior Director of Rescue and Community Outreach at North Shore Animal League America
When you search online for DIY cat shelters, you’ll discover that two types are most often mentioned: one uses plastic storage bins, and another uses Styrofoam coolers. Both work very well, as long as you follow procedures to make them snug and dry.
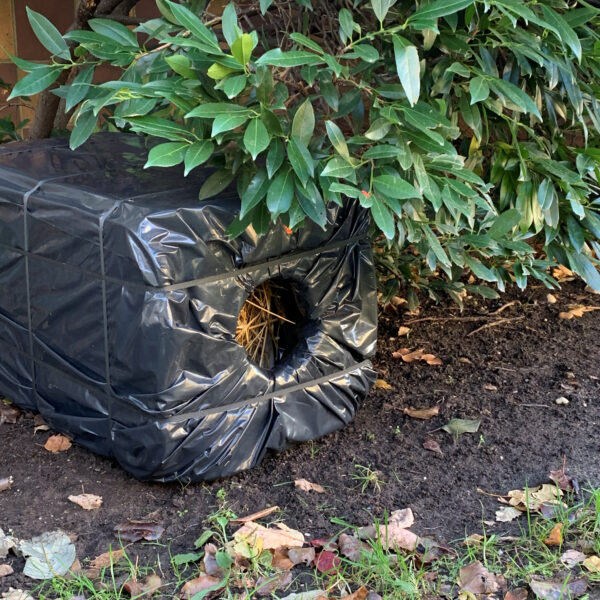
I’ll give you a few tips here about the Styrofoam cooler. If you are among the many people ordering food online nowadays, this is a great way to repurpose those delivery coolers and help community cats at the same time.
- Inspect the cooler; any cracks should be glued back together with a glue that adheres to Styrofoam, or use duct tape.
- To make doorways, take a bowl and outline it where you want your entrance to be. Cut the holes with a thin serrated edge. When pushing the pieces out, be gentle so you don’t break the wall of the shelter. Holes on the smaller side are best; they let in less cold air and deter larger animals from entering.
- At this point, decide whether you want two entranceways or one. If it’s a smaller cooler, one entranceway will keep it warmer, but it depends on where you locate the house and whether there’s a danger of unfriendly animals climbing in the single doorway and trapping a cat inside.
- If you have extra Styrofoam, cut it so it fits into the bottom of the cooler for additional insulation and durability. The lids should be taped down around the entire lid as well as around the entire cooler.

- Tape black garbage bags around the entire cooler to make it waterproof.
- Add straw. Do not use towels, blankets, or newspaper, which draw body heat. I recommend that you change the straw every few months if possible, and check in periodically to make sure the straw isn’t getting wet somehow.
- Weigh the cooler down with a piece of wood so it doesn’t blow away or fall over.
- Keep the houses in low-traffic, secure areas so the cat feels safe at night. A pathway should be cleared when it snows enabling the cats to get in and out without a problem.
Also, if you have several coolers you can tape two together and cut matching holes in the sides to make one big house. Then cover the whole house with black garbage bags.
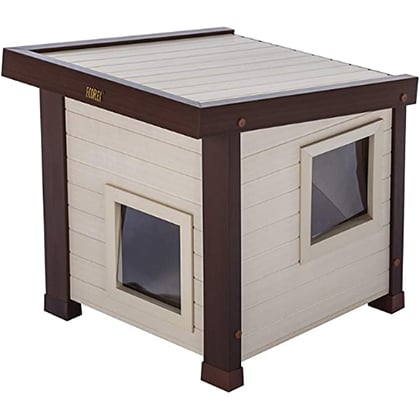
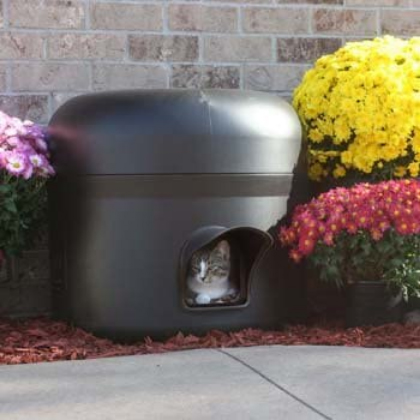
If you decide to purchase a house instead, here are two good options.

This one is great if you have a feral family or ferals that hang out together. They will sleep together and keep each other warm during the night.

This is another nice insulated house, but I would suggest placing this one in a quiet yard that doesn’t have much animal activity because it has only one doorway. However, the single doorway does help keep the cats toasty all night.
I also recommend that you do not feed ferals near their houses, so as not to attract raccoons and other wildlife. Also it’s important to feed at specific times and to pick up any leftover food before dark. Remember to put a bowl of water out when you feed the cats, but check it often because it will freeze.
Another good tip is to feed extra wet food at feeding times if possible. The cats will get moisture from the wet food, plus it provides extra protein the cats need to maintain their energy levels. If it’s not possible to feed extra wet food, that’s okay — just feed the cats additional dry food in the winter so they can maintain necessary energy levels. And be sure to check on the food, because when it’s very cold it will freeze just like water and will need to be changed.
And finally, if the cats are not ear notched, please contact your local animal shelter, humane society, or veterinarian to find out how to TNR (trap, neuter, return) to help stop the overpopulation of community cats.


